Recently a client of mine began rolling out Kubernetes in key parts of their infrastructure. If you’re not familiar with Kubernetes, it’s a devops tool originally developed by Google that allows you to manage containerized services. All signs are pointing to Kubernetes being the new hotness in the devops industry, so I figured I would get my feet wet and take it for a spin.
If I’m being honest, I originally thought the concept of containers was going to be another fad. To me it didn’t seem like there was enough benefits to be gained from working with containers to justify the abstraction. Part of that prediction stems from my ever building cynicism towards tech fads but the other part likely stems from my limited involvement in system administration. As it turns out, containers are here to stay, at least for now.
The Goal
The goal I had in mind was to launch a simple node application using Kubernetes to gain a better understanding of how it works. The node app is a simple REST API with a single endpoint and no real dependencies or environment requirements outside of a few node packages. To add some more y axis to the learning curve, I’ll be using Helm Charts to manage, define, and install the node application on the Kubernetes Cluster.
Creating a cluster locally
Unlike a lot of developers I primarily work in Windows. Now, don’t get me wrong I’m not a masochist, all of my development happens on an Ubuntu VM using VirtualBox. This did, however, put me at a disadvantage with setting up a Kubernetes cluster on my LAN. Like most open source tools, Kubernetes is designed to work in a unix environment so there was some friction at certain points.
To start I Installed Minikube on my machine. The Minikube developers have graciously provided multiple OS versions including Windows. The installation itself was easy and with VirtualBox already installed, I managed to get the cluster up and running in no time.
Installing minikube and kubectl
- Download the windows install file and run it.
- Download and install kubectl. I simply added it to a custom bin folder that I added to my PATH env variable.
- Open CMD and type
minikube start - Once minikube has spun up and the cluster is installed, you should be able to run
kubectl cluster-infoto confirm.
Minikube is great because although Kubernetes is designed to work with multiple nodes, it allows you to create a working cluster on your local network using only one VM. This is particularly helpful if you are working on a computer with limited hardware.
Dockerize It
If you’re following along and want to skip this part, you can use the public test image I pushed to dockerhub and skip to the next section.
Considering that Kubernetes is a container orchestration tool, the next step of the process was to create a containerized application. To do this I used docker, which I had installed on my Ubuntu VM, and a simple test application built in node. If you’re working strictly in Windows, there is a version for docker that should work the same.
Writing a Dockerfile for a simple app like this only took a few lines.
FROM node:8.5.0

WORKDIR /usr/src/node-service

# Install node packages
COPY package.json ./
RUN npm install

# Copy the source for the app
COPY . .

# Run the app
CMD ["npm", "start"]

# Expose container ports
EXPOSE 3000
Next I built the docker image locally and spun it up in a container to test that everything was working as intended.
docker build -t fullbit/node-service .
docker run -p 3000:3000 -d fullbit/node-service
Once confirmed, I pushed the image to a repository on dockerhub. If you don’t have an account, you’ll need to create one.
docker login
docker push fullbit/node-service:latest
The overall process of creating a docker file and pushing to a repository is really easy once you get the hang of it. For me the initial learning curve was simply understanding the difference between an image and a container. Once you understand that, it becomes much easier to work with.
Helm Charts
My client’s infrastructure relies on Helm Charts, so I decided it would be a good idea to explore it as well. Helm is a tool that helps you define, install, and update Kubernetes applications. Installing Helm was very simple:
Installing Helm
- Download the build.
- Unzip the folder and place helm.exe in the same bin folder you used for kubectl
- Open CMD and run
helmto confirm installation. - In CMD run the command
helm initto install Tiller on the minikube cluster.
Creating a chart was as simple as running helm create node-service which generates a directory with some files. The basic concept is that you define the chart using Chart.yaml and then template values in values.yaml. The values are then used to generate Kubernetes manifests by plugging values into templates in the templates directory.
To setup a very basic working chart for the node application we really only need to make a few changes to the generated chart files. First we need to define our docker container image repository and our service values:
replicaCount: 1

image:
  repository: fullbit/node-service
  tag: latest
  pullPolicy: IfNotPresent

service:
  type: NodePort
  port: 3000
  nodePort: 30001

ingress:
  enabled: false
  annotations: {}
  path: /
  hosts:
    - chart-example.local
  tls: []

resources: {}

nodeSelector: {}

tolerations: []

affinity: {}
Next we need to update our deployment template to use our service port value:
apiVersion: apps/v1beta2
kind: Deployment
metadata:
  name: {{ template "node-service.fullname" . }}
  labels:
    app: {{ template "node-service.name" . }}
    chart: {{ template "node-service.chart" . }}
    release: {{ .Release.Name }}
    heritage: {{ .Release.Service }}
spec:
  replicas: {{ .Values.replicaCount }}
  selector:
    matchLabels:
      app: {{ template "node-service.name" . }}
      release: {{ .Release.Name }}
  template:
    metadata:
      labels:
        app: {{ template "node-service.name" . }}
        release: {{ .Release.Name }}
    spec:
      containers:
        - name: {{ .Chart.Name }}
          image: "{{ .Values.image.repository }}:{{ .Values.image.tag }}"
          imagePullPolicy: {{ .Values.image.pullPolicy }}
          ports:
            - name: http
              containerPort: {{ .Values.service.port }}
              protocol: TCP
          livenessProbe:
            httpGet:
              path: /
              port: http
          readinessProbe:
            httpGet:
              path: /
              port: http
          resources:
{{ toYaml .Values.resources | indent 12 }}
    {{- with .Values.nodeSelector }}
      nodeSelector:
{{ toYaml . | indent 8 }}
    {{- end }}
    {{- with .Values.affinity }}
      affinity:
{{ toYaml . | indent 8 }}
    {{- end }}
    {{- with .Values.tolerations }}
      tolerations:
{{ toYaml . | indent 8 }}
    {{- end }}
Finally we have to update our service template to use our service values:
apiVersion: v1
kind: Service
metadata:
  name: {{ template "node-service.fullname" . }}
  labels:
    app: {{ template "node-service.name" . }}
    chart: {{ template "node-service.chart" . }}
    release: {{ .Release.Name }}
    heritage: {{ .Release.Service }}
spec:
  type: {{ .Values.service.type }}
  ports:
    - port: {{ .Values.service.port }}
      nodePort: {{ .Values.service.nodePort }}
      protocol: TCP
      name: http
  selector:
    app: {{ template "node-service.name" . }}
    release: {{ .Release.Name }}
By default our application will run on an internal IP and will not be available publicly. To expose our application, we define a nodePort service to expose the app container to a port on the node hosting the app.
To read more about Kubernetes services take a look here.
Next I packaged the helm charts for deployment with helm package node-service and deployed it with helm install node-service-0.1.0.tgz
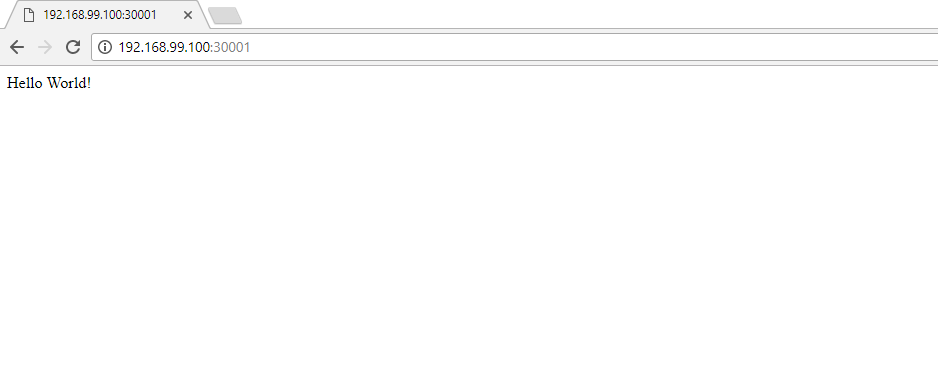
Now we can navigate to <node IP>:<nodePort> to check if our app is running. We’re running Minikube so there’s only one node but you can use the following command to get the node IP:
kubectl get nodes --namespace default -o jsonpath="{.items[0].status.addresses[0].address}"
There we have it! We’ve deployed our application using Helm and Kubernetes to our local cluster, exposed it using a nodePort service, and are able to reach the application through our browser.
Although Helm itself is not overly complicated, I definitely found the extra layer of abstraction confusing. It does seem like Helm is a convenient way to manage your applications in Kubernetes though. I could see this being particularly valuable if you are working with multiple larger applications.
The end
There’s a ton to learn about Kubernetes and how it works but the basic setup is relatively straightforward to implement. Now that I’ve dipped a toe in, I definitely feel more comfortable with the technology and look at it less as a black box and more of a useful tool.
Thanks for reading!